
Installation Instructions Included with Switchplate Orders
Adapting Magnets to Dimmer Switches with Aluminum Frames
Wiring and Installation of Phone Jacks
Mounting Magnetic Phone, Cable, or Blank Plates
Modifying Custom Color Covers for Lutron Receptacles
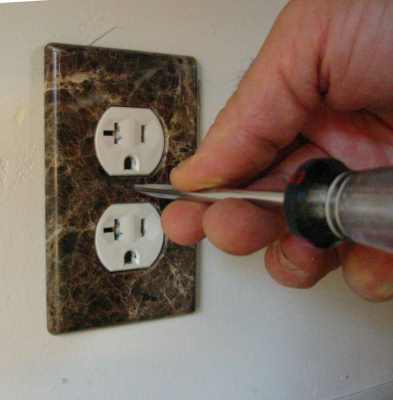
Installing stone switchplates is very straight forward and easy, just be careful not to over tighten the mounting screws! If your switches and receptacles were mounted correctly to begin with all that is needed is to remove the old covers and screw on your new stone switchplates with the color coordinated screws. When running the screws in hold the screwdriver by the shaft as in the photo so you can better feel when the screw starts to tighten up. If you upgraded to magnetic switchplates just set them in place after removing the old switchplates and you are done. The magnets hold well enough that they will never come off inadvertently but they will never put any stress on the switchplate. If you have magnetic switch plates and dimmer switches then go Here.
If your switchplate rocks because your wall is not flat then you will need to stabilize them. To do this add small dabs of caulk under the corners that move, cover the caulk with a piece of paper towel, and gently install the switchplate to level the caulk. I like to use paper towel since it breaths so the caulk dries quickly and completely, unlike plastic. Rocking switchplates will put a lot of stress on the screw on type and the magnetic type may fall off if bumped.
The photo below shows a pea size dab of caulk with the remains of the paper towel in the lower right corner. This is all that is needed for magnetic plates but for a screw on plate I would have used more caulk along the sides and bottom for more support.
Screw-mount Switchplate Installation Instructions
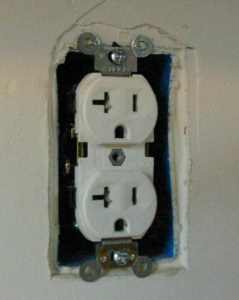
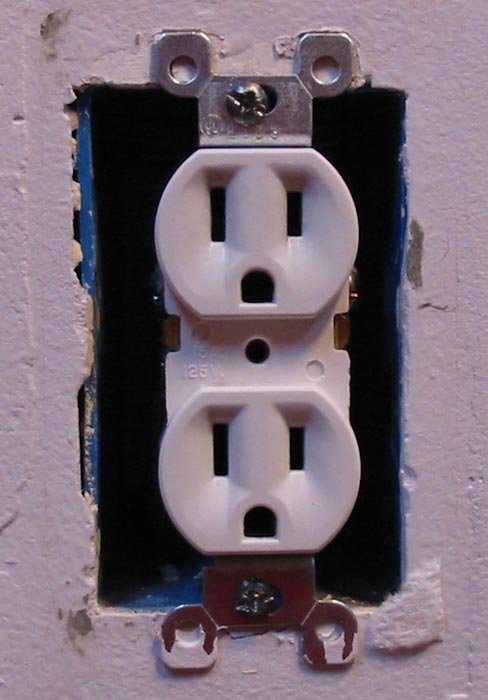
Installing stone switchplates is completely different than installing plastic ones. When installing stone switchplates it is very important that the receptacle or switch is correctly installed prior to the installation of the switchplate. The switch or receptacle must be mounted so there is no movement in the unit itself and it must be at the correct plane to the wall so that when the switch or receptacle is used very little load is transferred to the plate. If the plate doesn’t naturally sit flat against the wall remove it and adjust the switch or receptacle until it does. It is also a good idea to check the fit between the plates and the receptacle or switch before mounting to make sure there are no conflicts. The screws should just hold the plates in place with no tension on the plates. The screws should not be tightened any more than you can with your thumbnail. Any more tension than this and you could break your stone switchplate.
Note to contractors /electricians: Do not try to pull the switch or receptacle into the switchplate with the screws as is commonly done with plastic switchplates. This will break stone switchplates.
Magnetic Switchplate Installation Instructions
The tighter the stone is installed to the electrical boxes the better supported the fixtures will be. For the proper installation of your stone switchplates, the electrical boxes must be mounted so they don’t protrude beyond the surface of the stone. The fixtures should rest firmly on the surface of the stone, without any movement of the fixture itself. It is necessary to use the mounting screws provided with the fixtures to mount them to the electrical boxes and not sheetrock screws. Make sure the metal frames on the fixtures are straight and flat before installing and that they do not get bowed when screwing them tight to the wall. When installing multi gang switchplates it is safest to use a plastic switchplate to align the fixtures with each other prior to installing the stone switchplate. Now that the fixtures are properly mounted, gently set the switchplate in place being careful not to let the magnets snap it in place. The magnets are quite strong! If the switchplate rocks on the wall then remove it, apply a pea size amount of caulk to the wall under the corner where the switchplate rocks, cover the caulk with a piece of paper towel so it doesn’t glue the switchplate to the wall, and gently set the switchplate back in place.
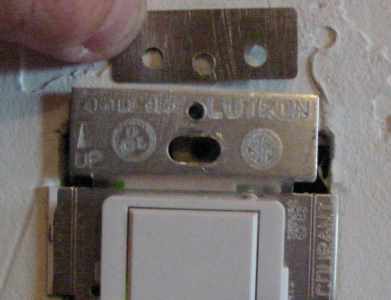
Adapting Magnets to Dimmer Switches with Aluminum Frames
Since the aluminum frames of dimmer switches are not magnetic steel shims that we make need to be installed behind them for our screwless switchplates to work. To install them simply remove your old switchplate, remove one of the screws that hold the switch in place, slide the shim behind the switch frame as shown in the photo below, and then screw the screw back in. Once secure do the other end and you are ready to put your new switchplate in place.
Wiring and Installation of Phone Jacks
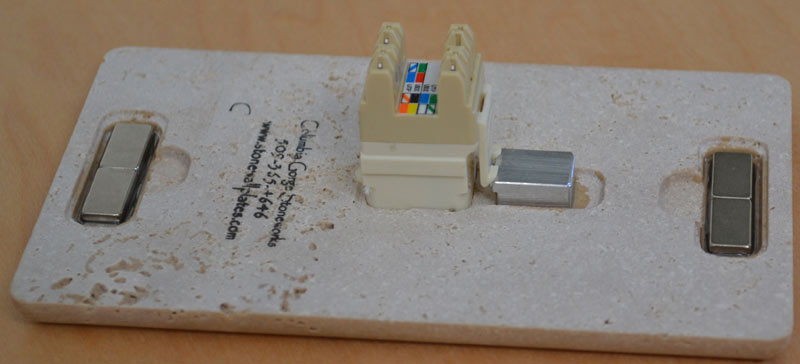
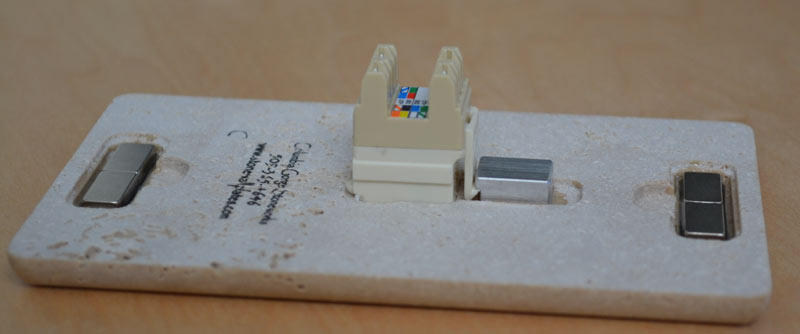
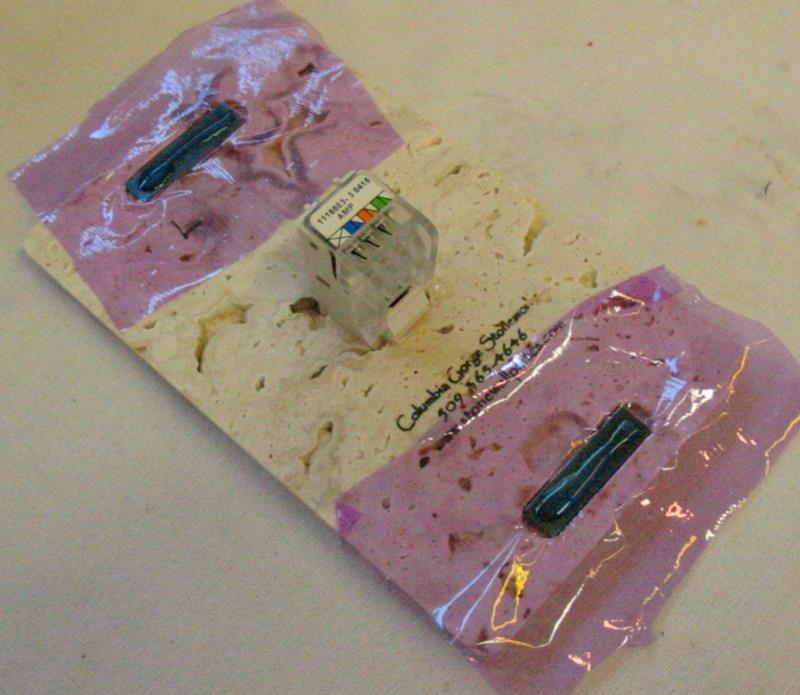
The phone jacks that we supply are standard punch down style keystone jacks. Please follow the wiring instructions provided by the jack manufacturer that are sent with your order, or follow the link below. Punch the wires into the jacks before snapping them into the stone plate. The shock from the punch tool can break the plate if the jack is attached to the plate. Once the jack is wired, simply press it into the hole with the plastic snap facing the aluminum block glued to the back of the plate, as shown in the first photo below, until it snaps into place, as shown in the second photo. The jack is removed by depressing the snap with a small screwdriver wedged between it and the aluminum block while pulling out. Please be gentle with the plate. It is fragile.
Wiring Color Cross Reference Chart
|
Instructions for Mounting Magnetic Phone, Cable, or Blank Plates
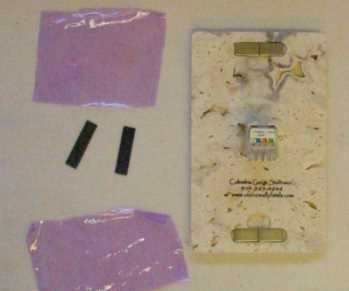
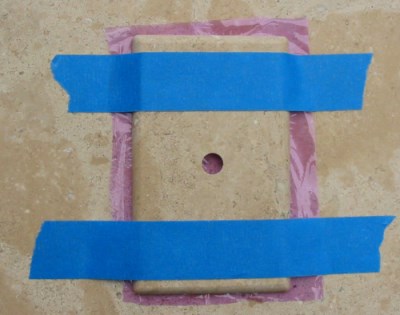
With phone, cable, or blank plates there is no steel for the magnets to attract to so you will have to glue the steel strips that we provide above and below the electrical box. This is a simple process as is shown in the photos below. First lay a piece of thin plastic such as Saran Wrap or such over the plate. The plastic is so that you don't glue the plate to the wall, only the steel strips. Next put the two steel strips in place over the magnets that come glued to the plate, making sure that they do not protrude above the bottom of the plate. Test fit the plate against the wall to make sure it lays flat against the wall. Once you are happy with the fit apply a few strips of tape to the plate. It is a good idea to test taping the plate in place before involving any glue. Make sure that the tape used will hold and doesn't leave any adhesive on the stone when pulled off. I have found 3M's blue painters tape is the best. You may wish to use strips of tape along two edges of the plate applied to the wall as reference marks to help position it. This will help ensure the plate is centered over the cutout.
Now you are ready to apply some glue to the steel strips. The best glue to use is epoxy, generally the longer the cure the better it will bond but super glue works fine. I used a gap filling or gel super glue for the photos. Once you are ready for the glue apply about as much to the steel strips as I show in the photo below. This photo does expand for a closer look.
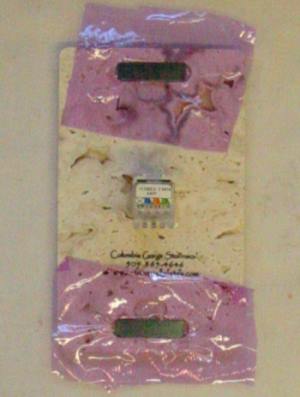
Now that you have glue on the steel strips tape the plate tightly to the wall exactly where you want it.
Once you are sure that the glue has fully cured, gently remove the plate. The magnets hold very well so you may need to use a razor blade to pry the plate up enough to get a grip on it. Now attach either the cable or phone line to the jack, put the plate in place, and you are done.
Modifying Custom Color Covers for Lutron Receptacles
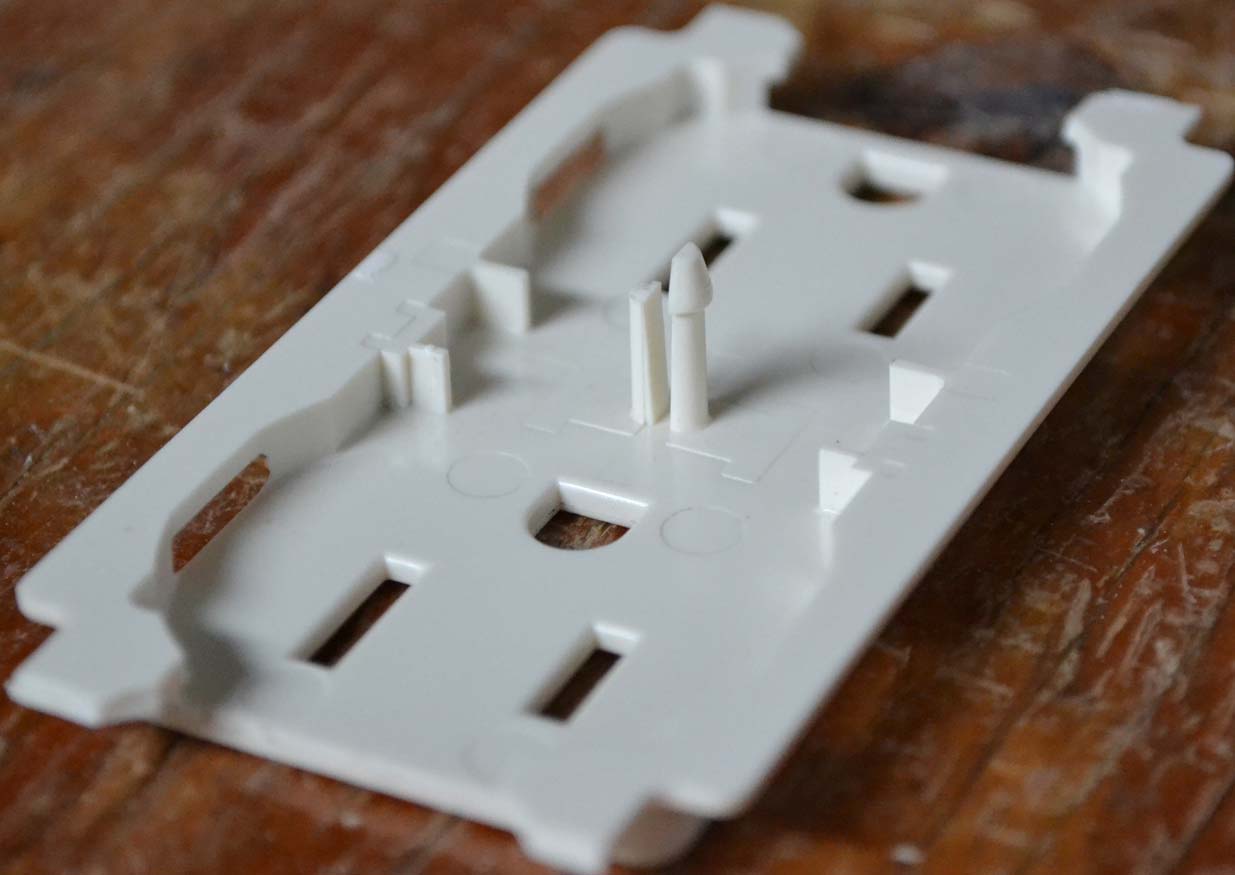 If you are using the Lutron fixtures with one of the custom colors then you will need to modify the covers used on the receptacle fixtures. These are a plastic cover that snaps onto a standard duplex receptacle fixture to make a standard rectangular shaped outlet receptacle with the custom color. The photo on the left shows the backside of one of the covers after removing it from the fixture, being very careful not to damage the snap as shown on the right. Using a pair of scissors, or wire cutters, it is easy to trim the tabs back leaving the small pieces in the corners. These corner pieces are needed to help hold the cover in place under the switchplate.
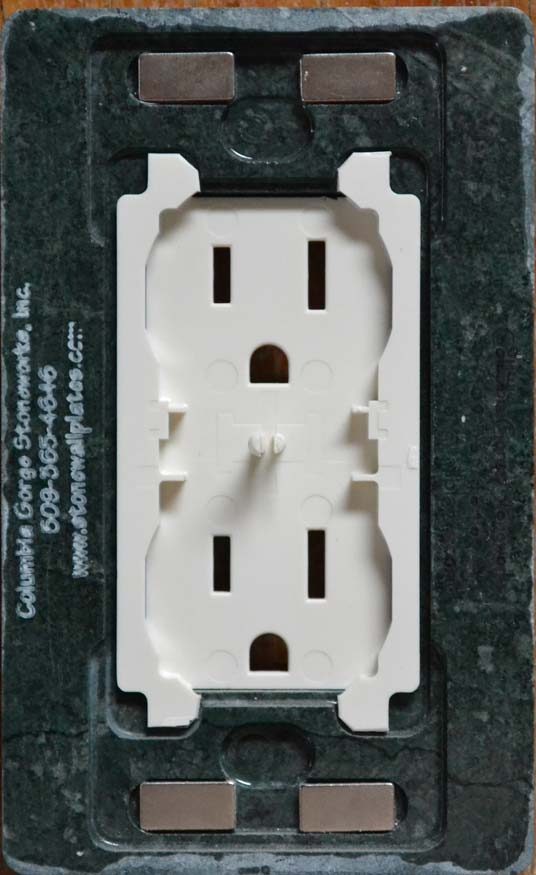
This photo shows how the cover should be trimmed to fit the pockets on the backside of your new switchplate.
If when you are finished your switchplate doesn't fit then the problem most likely is that your fixture is a little large. Since the cover goes over a duplex fixture and the switchplate is for a standard rectangular shaped outlet fixture the opening is .015" smaller top to bottom, compared to our duplex switchplates. All you need to do is sand a little off the top and bottom of the fixture.